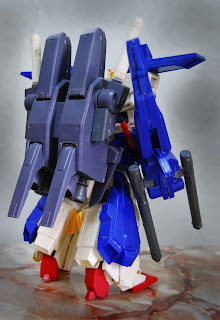
Note: I mainly snapped photos of the Musha Crossbone X1 while for X2, i only snapped some photos of the different runners.
-------------------------------------------------------------------------------------------------------------------------------------------------------------------------------------
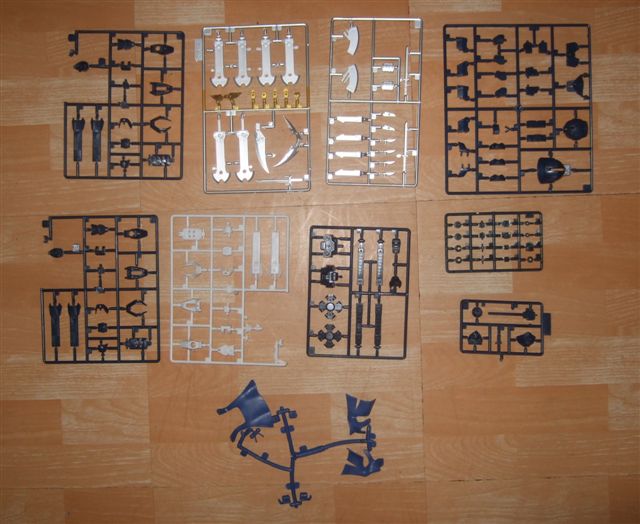
Runner A [Left] & Runner E1 [Right; and exclusively for X1 only]
Runner B [If you noticed from the instruction manual showing the runners + numbers, in the X1 box I got, no.13 and 14 is not present in it..strange...]
Runner C0
Runner C1 [exclusively for X1 only]
Runner C3 [this particular runner seems like is for assembling the Crossbone X3]
Runner D; Runner F[X1's is white while X2's is navy blue & it's PVC i guess since it is soft] & Runner S1 [Polycaps]
-------------------------------------------------------------------------------------------------------------------------------------------------------------------------------------
Some close up shots of the runners to see the details.
The rubber hand.
The face plate.
Interchangeable eye.
Front skirt armor.
Side binder inner armor.
Head crest.
Upper body.
Forearm guard [which are actually the beam marker for the Crossbone Gundam] and the katana.
Shield for X1 only.
Chest emblem details which I believe is supposed the Crossbone Vanguard emblem, but..doesn't really look like it. ^^;
Again, chest emblem & shoulder armor part.
-------------------------------------------------------------------------------------------------------------------------------------------------------------------------------------
-------------------------------------------------------------------------------------------------------------------------------------------------------------------------------------
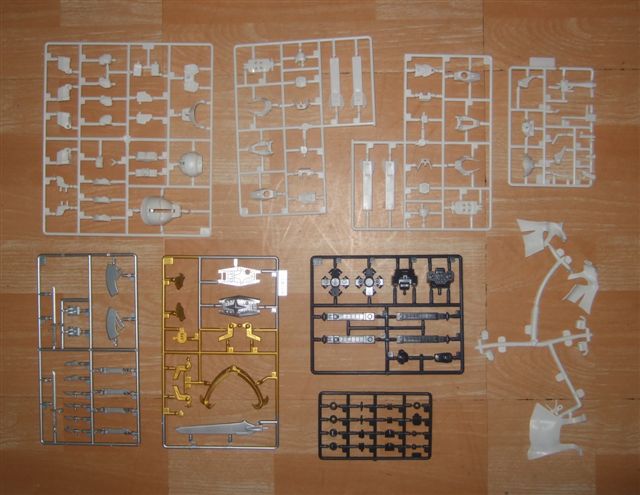
We'll be looking at Musha Crossbone Gundam X2's runners now.
-------------------------------------------------------------------------------------------------------------------------------------------------------------------------------------
Runner B: [Notice part no.13 & 14 is present in both runners, while in X1, these 2 parts are not present in the runner]
Runner C2 [Exclusive for X2 only]
Overall view of the runners
Close up shot of the interchangeable eyes. Should be clearer here on the details. :)
Runner B [the missing part as I mentioned from X1's runner B; odd enough, these 2 parts came in X2's box, looking as if it was chipped from the original white coloured Runner B for X1.]
-------------------------------------------------------------------------------------------------------------------------------------------------------------------------------------
Now, as for the..stickers. Not foil stickers it seems..
Musha Crossbone Gundam X1's
Musha Crossbone Gundam X2's
The bad news: You have to cut the stickers out individually out to paste them.. Though I'd rather colour it than use the stickers but I have to say they are nice and the surface is not rough like those seen in pirated/3rd part kits
The back side of the sticker there is this "TRADEMARK PAPER" naming there..Any idea what is it? a type of paper..?
-------------------------------------------------------------------------------------------------------------------------------------------------------------------------------------
-------------------------------------------------------------------------------------------------------------------------------------------------------------------------------------
And now, for the box.
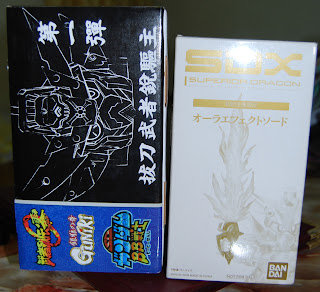
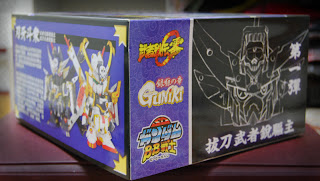
Here, I'll do a size comparison with the SDX Superior Dragon.
Top view
Side view [not sure what's the deal with the SD Gundam BB Senshi logo.. ^^;;]
Front view
-------------------------------------------------------------------------------------------------------------------------------------------------------------------------------------
The real box. The other box is actually thick cardboard to protect the actual box that stores the runners and everything else.
The actual box size front view comparison with the SDX Superior Dragon.
Top View
Other angles
-------------------------------------------------------------------------------------------------------------------------------------------------------------------------------------
Thoughts:
1. The runners & the parts seems pretty clean, with some good amount of details.
2. Remember I mentioned that Runner B from X1's kit is missing part no.13 & 14? I found out that one buyer bought the Guniki Musha Crossbone Gundam X2 and has the extra Runner B in the X2's kit.
The only possible reason is that I could figure out why mine and this fellow buyer's 2 Musha Crossbone Gundams are having different runner Bs is the QC when packing the items all together. Maybe for mine they just cut them off from a white coloured runner with part no.13 & no.14 and chuck it into the X2's box to pack.
Below are images from this fellow user and do check out his reviews too as they are painted!
Another buyer's X2 runners [with Runner B being the extra with part no.13 & no.14]
Same buyer's X1 runners [notice his Runner Bs also do not have part no.13 & no.14]
3. As you can see, there are very little coloured separated parts [only the silver and gold colours cought my attention] as compared to MC Model's SD line, the EX-S Gundoom and its variant, the Deep Striker Gundoom, but for an SD, there are good part separations. So, paint this kit and it'll look awesome.
4. Like the SDX line, Guniki's SD Musha Crossbone Gundams have interchangeable eyes, which I personally think is quiet good so the user could change the eyes to his/her liking, rather than using foil stickers with 3 different variants of eye styles and getting to choose only 1 style in the end..
4. Like the SDX line, Guniki's SD Musha Crossbone Gundams have interchangeable eyes, which I personally think is quiet good so the user could change the eyes to his/her liking, rather than using foil stickers with 3 different variants of eye styles and getting to choose only 1 style in the end..
-------------------------------------------------------------------------------------------------------------------------------------------------------------------------------------
I will assemble the X1 first, just a straight build to see how the joints and everything are like.
Thanks for looking through and enjoy. :)


